 ( 055 ) 8-Aug-2015
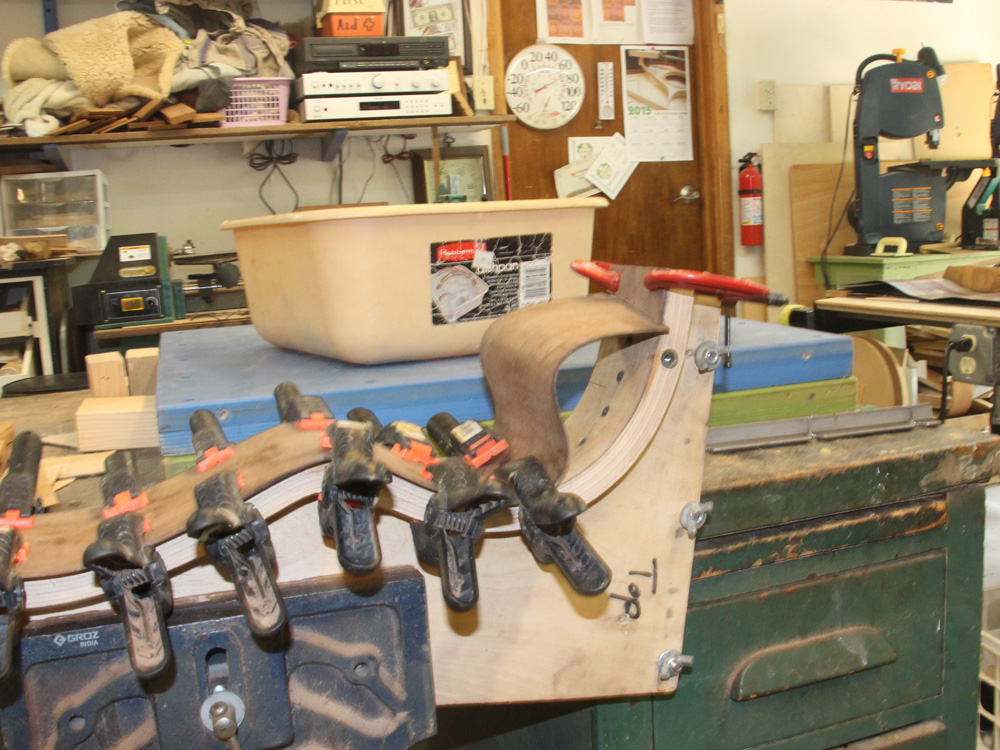
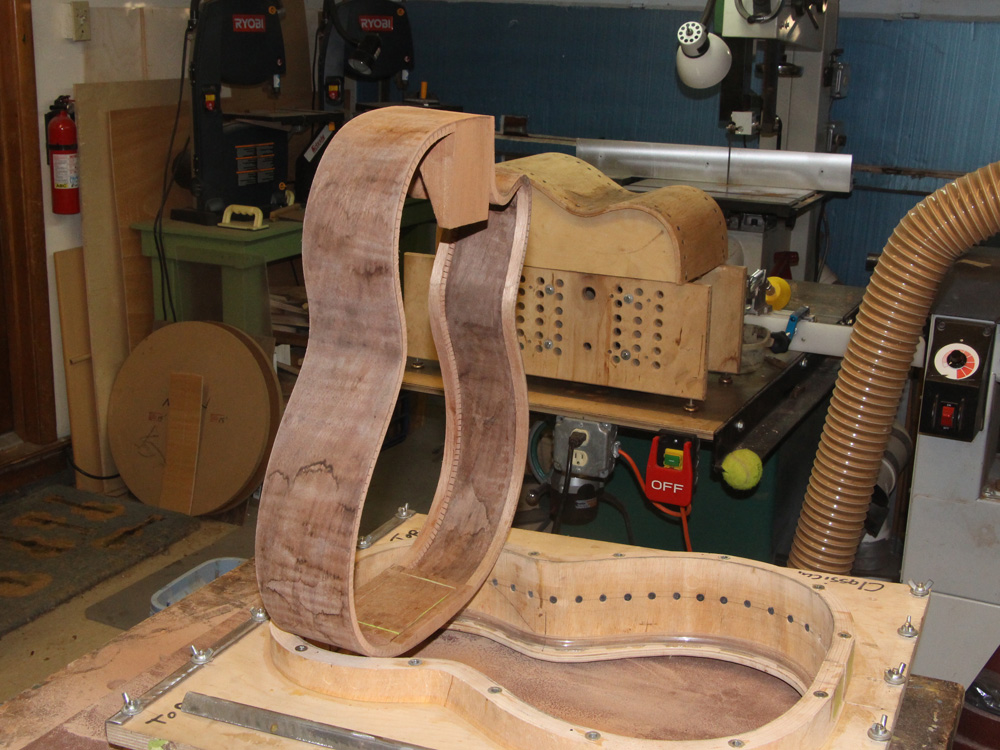
Now I have laid the bent side blank in the form.
( 055 ) 8-Aug-2015
Now I have laid the bent side blank in the form.
 ( 056 ) 8-Aug-2015
And I carefully trace out the shape of the side on the blank. I have built the forms so they have the desired shape.
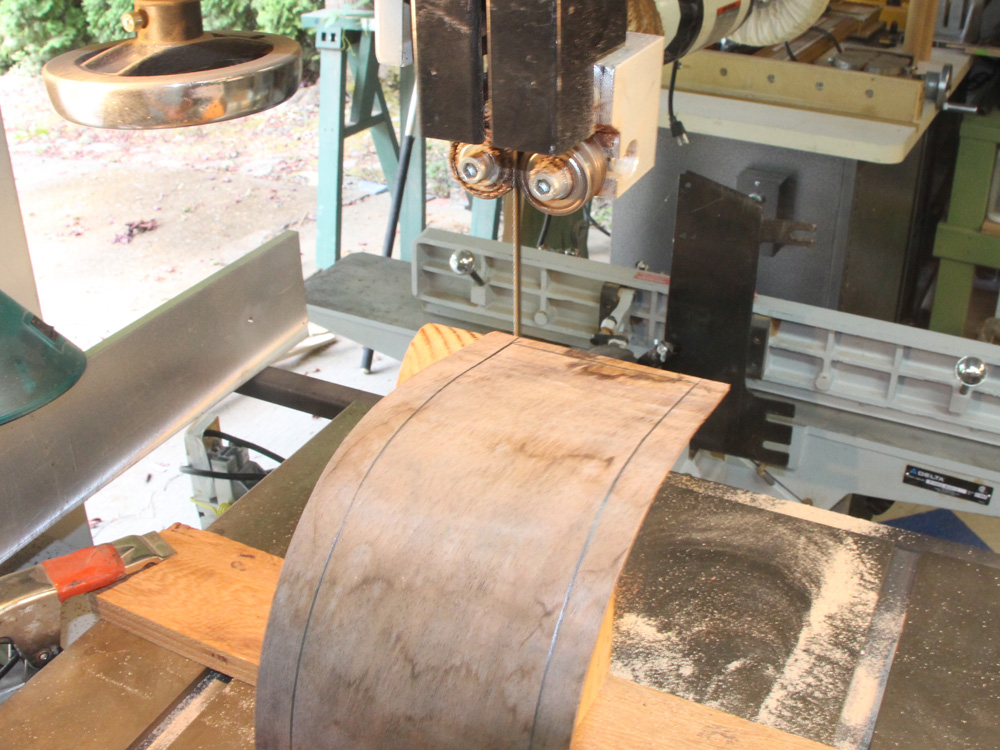 ( 057 ) 8-Aug-2015
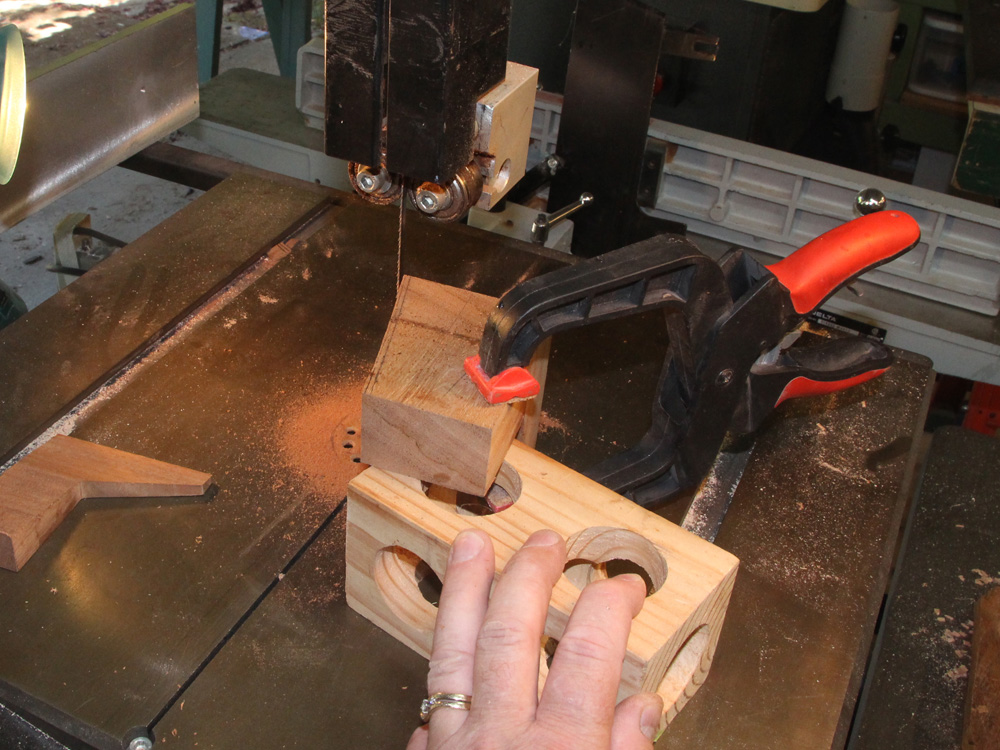
I use my band saw and a raised anvil to trim the side blank to shape.
 ( 058 ) 8-Aug-2015
 ( 059 ) 8-Aug-2015
 ( 060 ) 8-Aug-2015
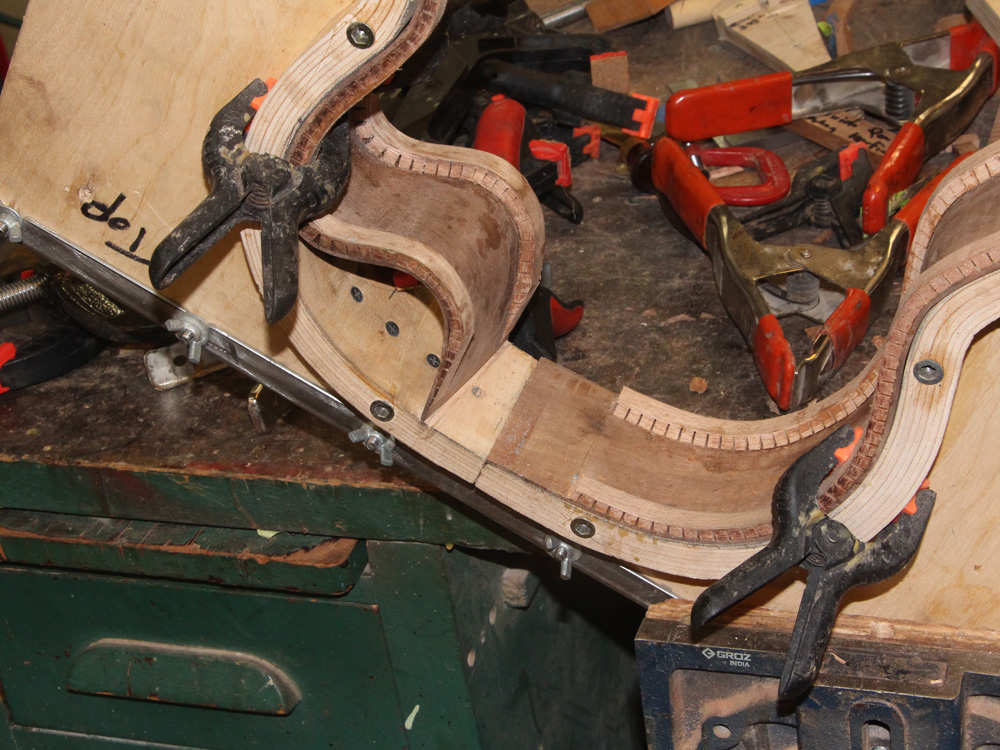
The cutaway side requires special attention at the front end. The angle of the cut and the length of the cut have to be just right.
 ( 061 ) 8-Aug-2015
I start out with the piece a bit longer than necessary.
 ( 062 ) 8-Aug-2015
And then slowly trim the end until it fits perfectly. The cutaway is bent to follow the shape of the heel so there will be a minimal shelf between the neck and the body. This causes the shape of the cutaway side to be highly complex.
 ( 063 ) 8-Aug-2015
 ( 064 ) 8-Aug-2015
 ( 065 ) 8-Aug-2015
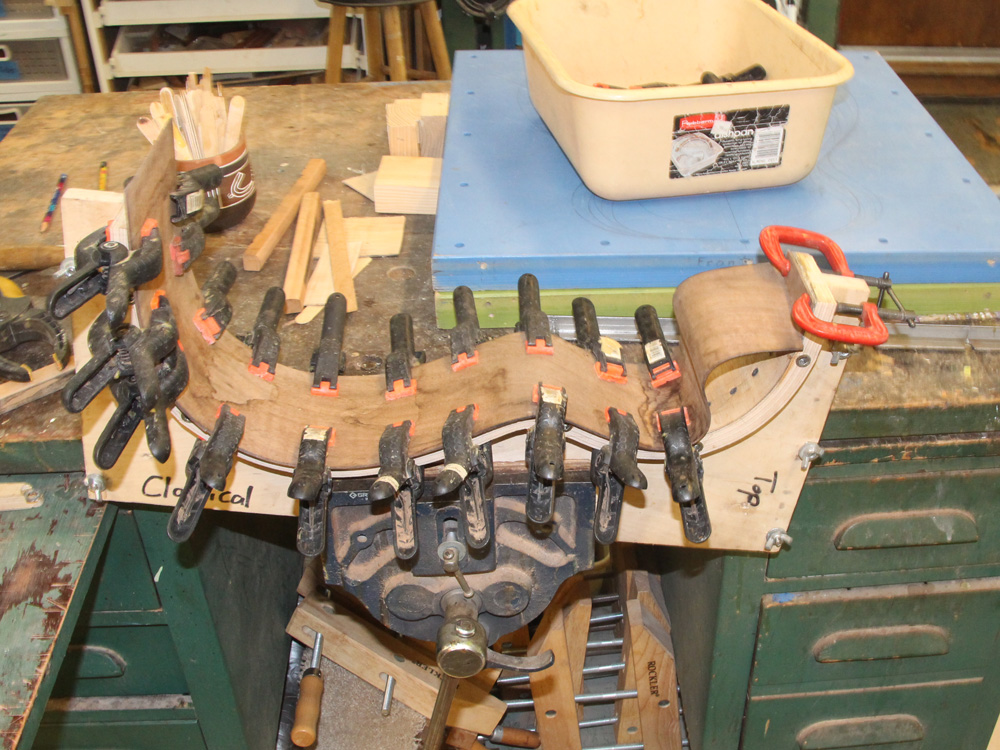
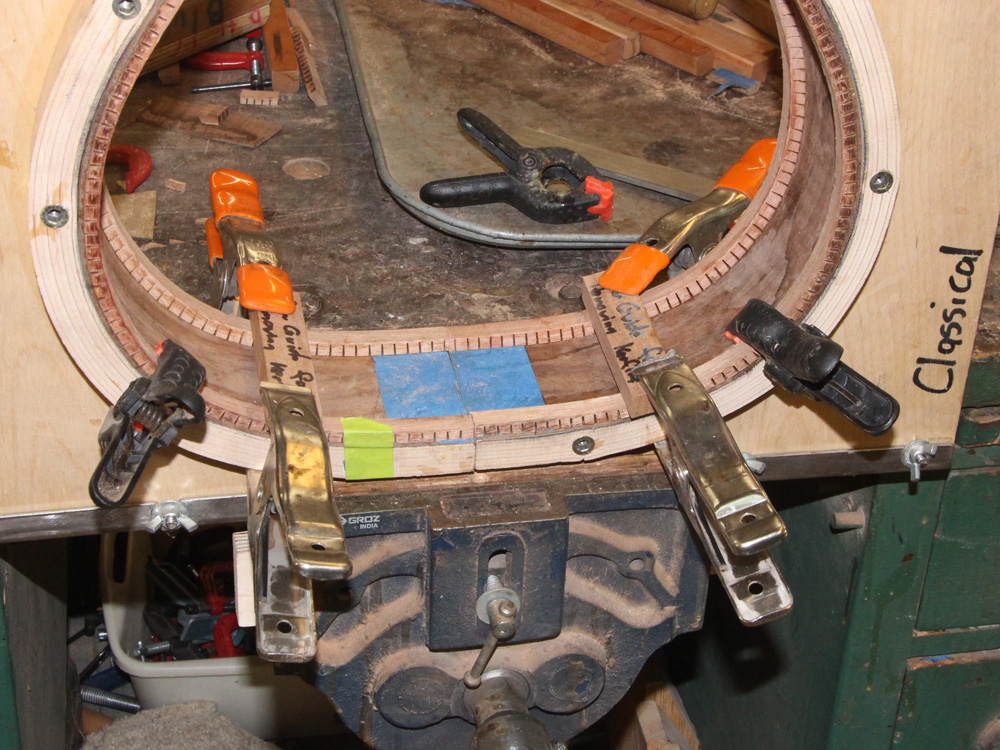
Lots of clamps to make sure everything is fitting just right.
 ( 066 ) 8-Aug-2015
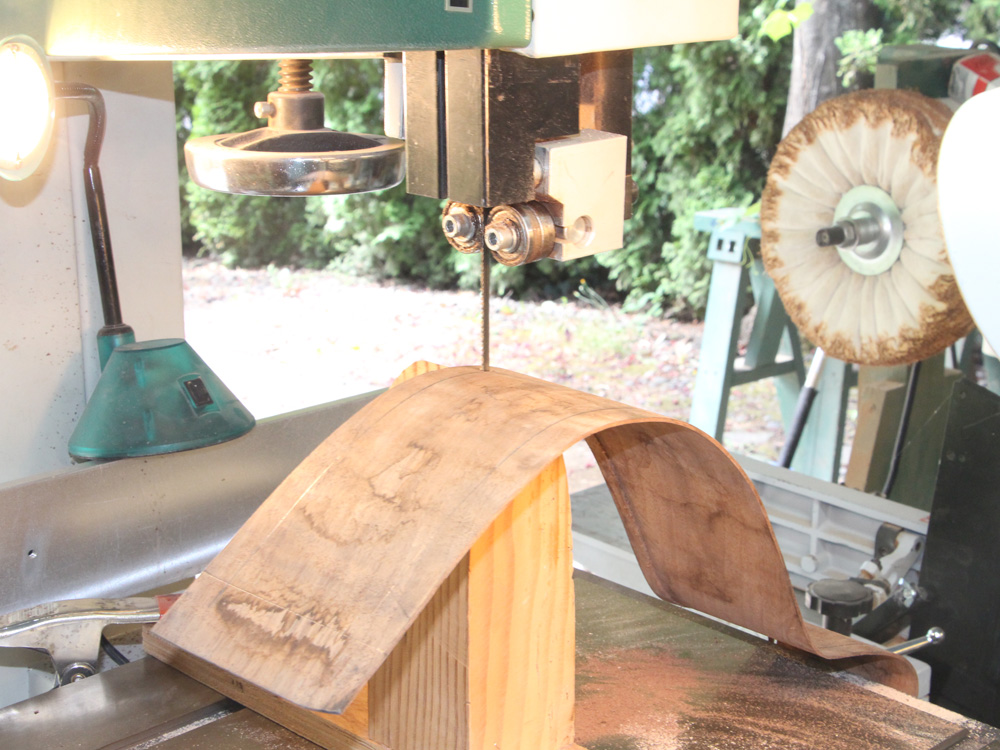
And then after marking the sides I use the bandsaw to trim off the excess.
 ( 067 ) 8-Aug-2015
Making sure everything fits again.
 ( 068 ) 8-Aug-2015
I use the multi-tool to trim the end pieces.
 ( 069 ) 8-Aug-2015
 ( 070 ) 8-Aug-2015
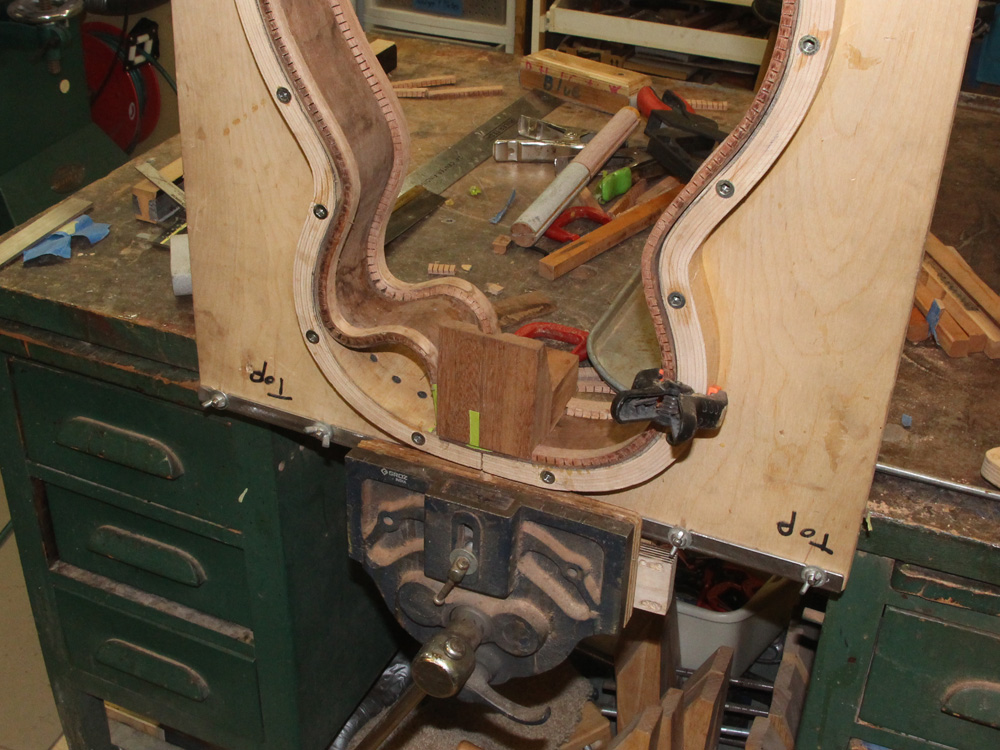
And then I put everything back into the form to make sure it all fits.
 ( 071 ) 8-Aug-2015
For a cutaway I use a special trick to mark the cut line on the curved sections.
 ( 072 ) 8-Aug-2015
I carefully position the sides in the form over the sanding plate and then use an elevated scribe to mark the cut line.
 ( 073 ) 8-Aug-2015
Then I use the sanding belt to trim the section to shape.
 ( 074 ) 8-Aug-2015
Making sure everything fits again.
 ( 075 ) 8-Aug-2015
Now I turn my attention to making the kerfing.
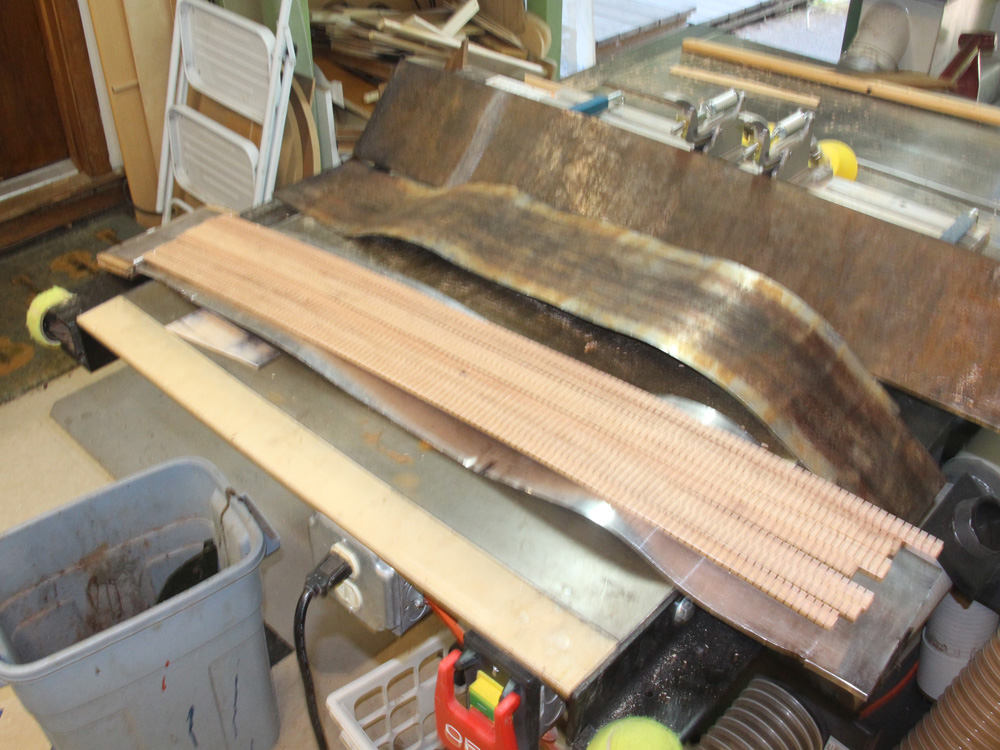 ( 076 ) 8-Aug-2015
The cut kerfing will be bent in the same way that the sides were bent.
 ( 077 ) 8-Aug-2015
 ( 078 ) 8-Aug-2015
 ( 079 ) 8-Aug-2015
I place a bit of tape over the section where the tie blocks will go so it is easy to remove the kerfing once it is glued in place.
 ( 080 ) 8-Aug-2015
The kerfing gets a bit of glue.
 ( 081 ) 8-Aug-2015
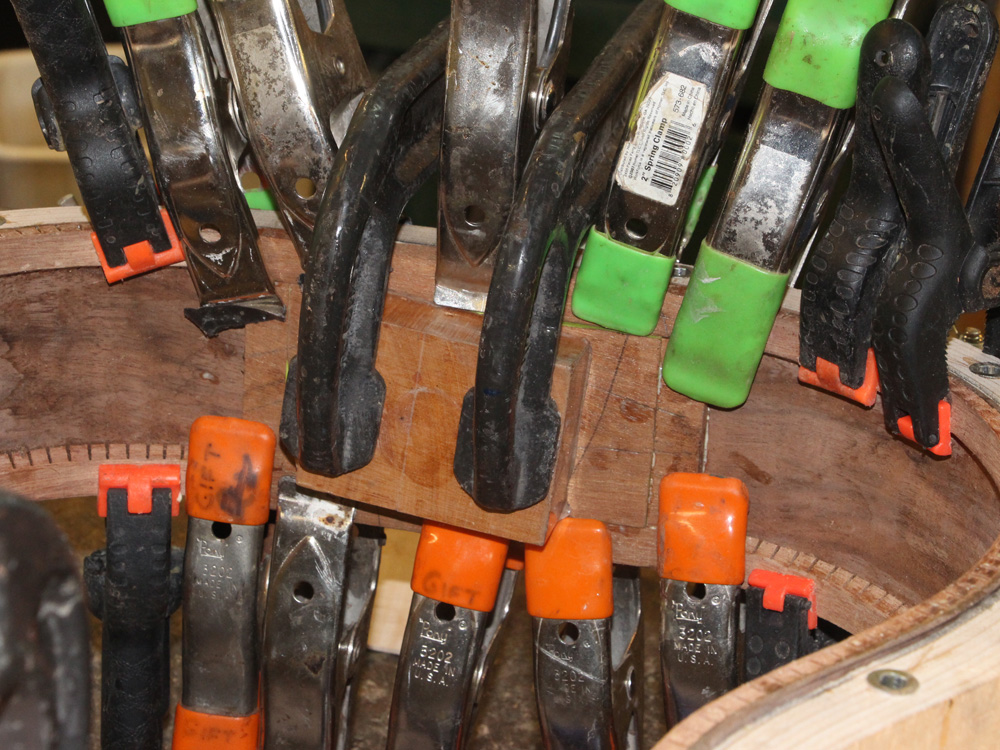
And is glued in place along the edges using lots of clamps.
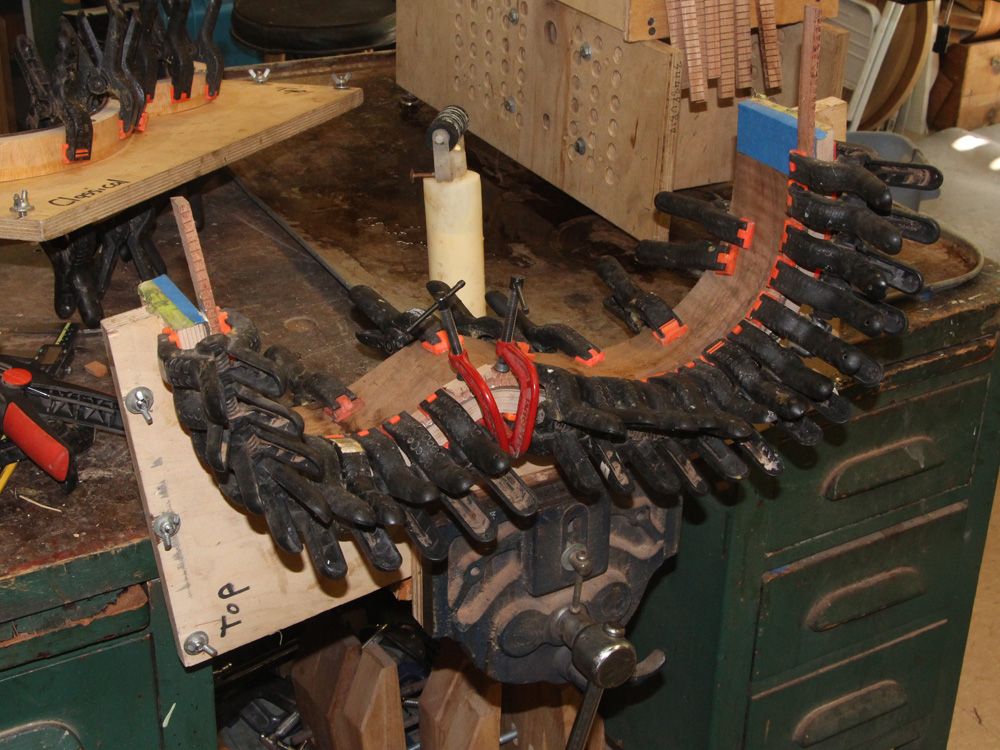 ( 082 ) 8-Aug-2015
The clamps press the kerfing into the sides and the sides into the form, so the final shape of the sides will be the same as the form.
 ( 083 ) 8-Aug-2015
First one side of the the kerfing and then the other.
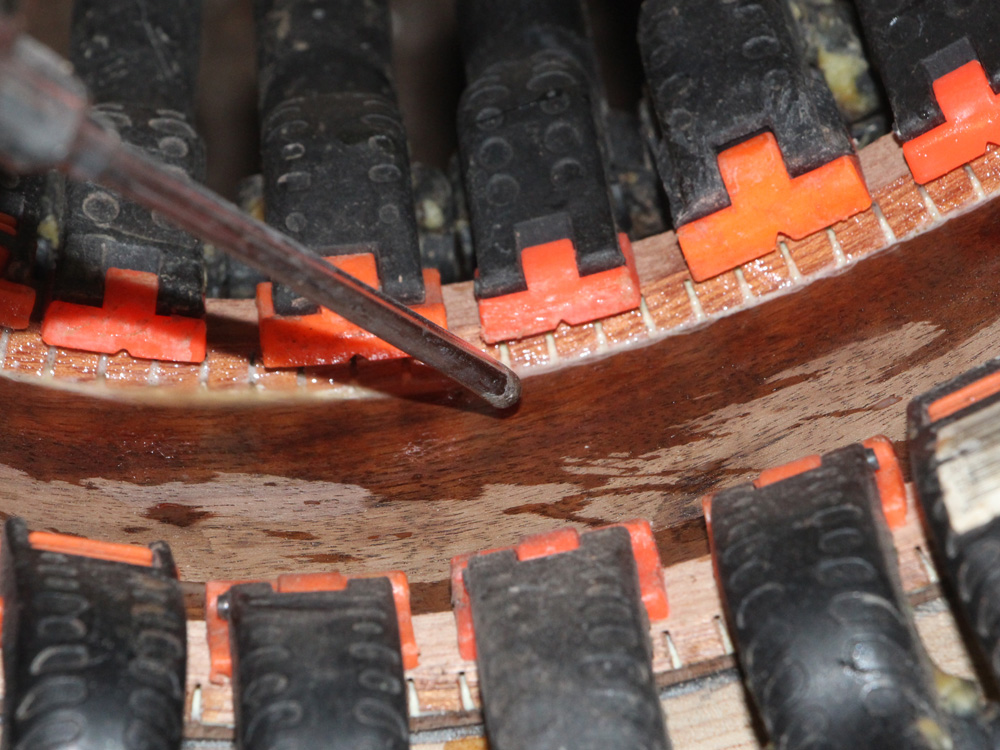 ( 084 ) 8-Aug-2015
I use plenty of glue and then use the air gun to blow out the excess.
 ( 085 ) 8-Aug-2015
The cutaway side requires a bit of special attention because of the tight curves.
 ( 086 ) 8-Aug-2015
 ( 087 ) 8-Aug-2015
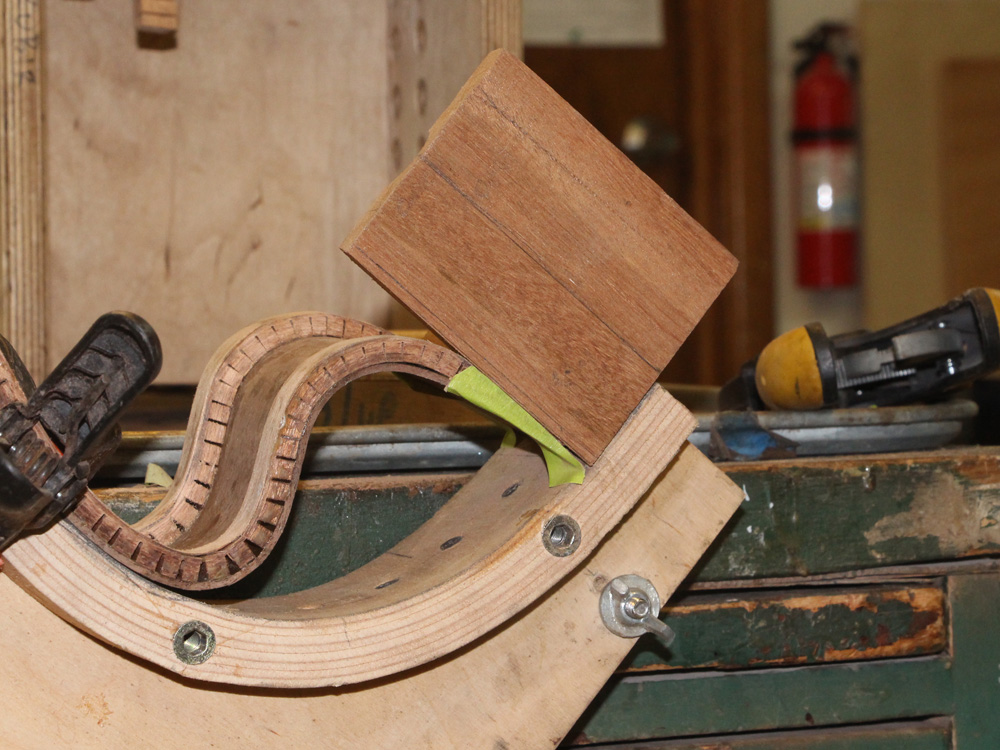
I have chosen to add an addition layer of mahogany stripping over the curved sections of the cut away to guaranty its integrity.
 ( 088 ) 8-Aug-2015
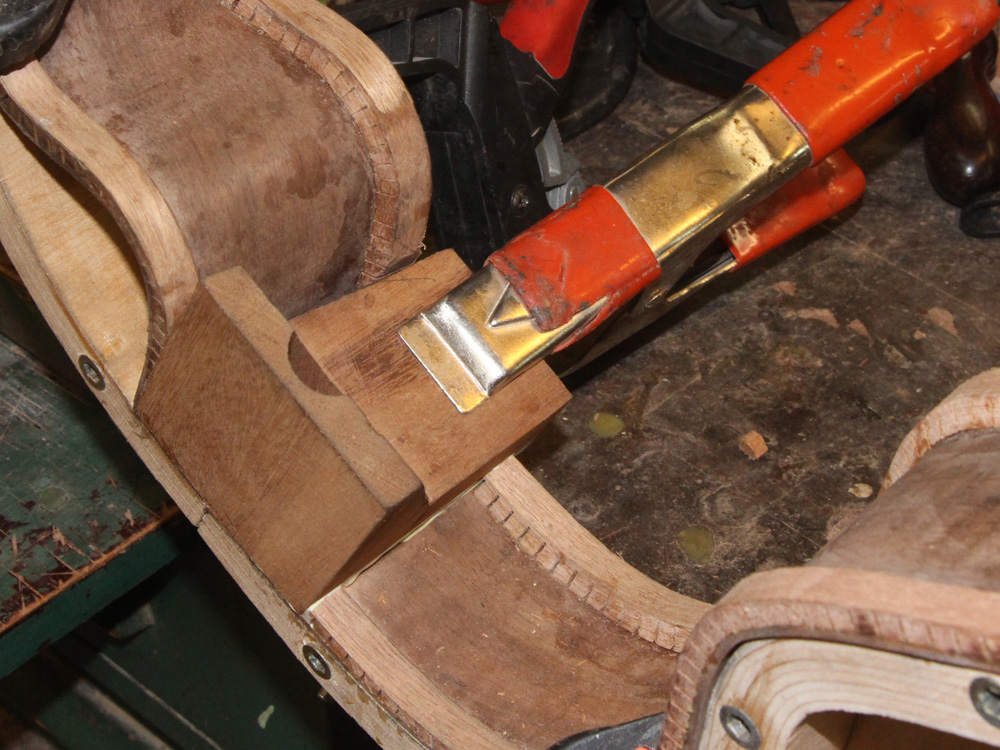
Now I start making the heel block.
 ( 089 ) 8-Aug-2015
The central hole will be used to screw the neck to the body.
 ( 090 ) 8-Aug-2015
The two side holes are used to adjust the yaw of the neck.
 ( 091 ) 8-Aug-2015
And then the fret board plate gets trimmed to an angle.
 ( 092 ) 8-Aug-2015
 ( 093 ) 8-Aug-2015
I have marked the shape of the neck on the front of the heel block and use the band saw to trim it to shape.
 ( 094 ) 8-Aug-2015
And then I mark the kerfing where it will get sanded away.
 ( 095 ) 8-Aug-2015
 ( 096 ) 8-Aug-2015
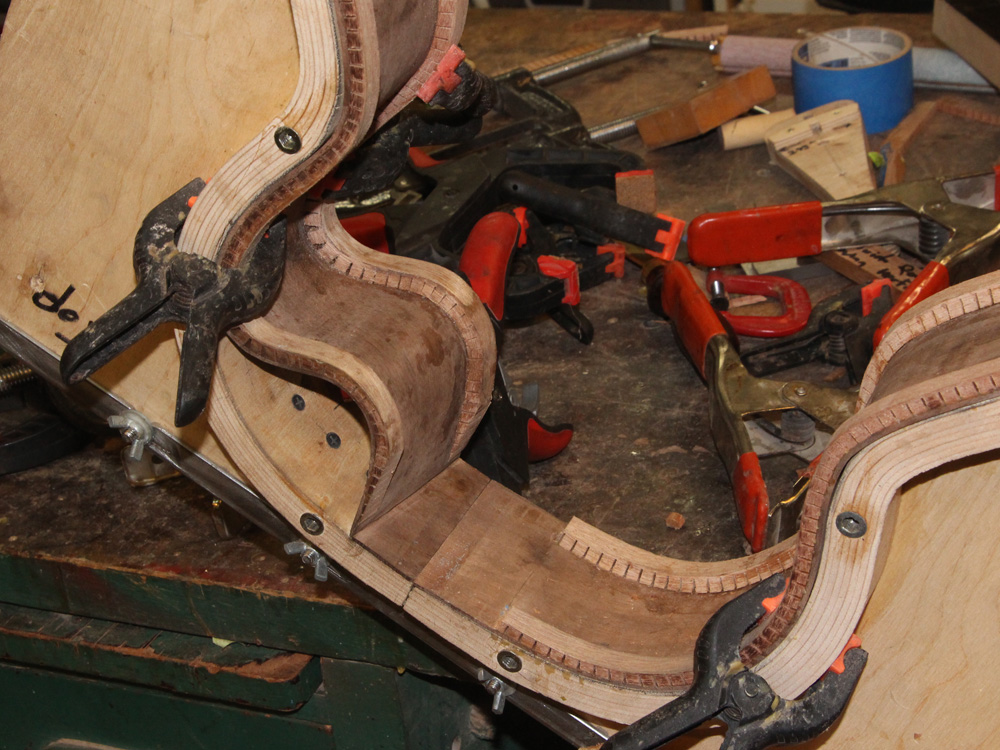
I work the assembly until the heel block fits just right.
 ( 097 ) 8-Aug-2015
And then trim the kerfing off off the other side.
 ( 098 ) 8-Aug-2015
Now the heel block will fit into the space and join the two halves of the side together.
 ( 099 ) 8-Aug-2015
But first I check using lots of clamps that everything fits right and points in the right direction.
 ( 100 ) 8-Aug-2015
The tail block gets positioned.
 ( 101 ) 8-Aug-2015
And saw guides are placed so the tail block will fit perfectly.
 ( 102 ) 8-Aug-2015
This tail block will have a trap door so we can access all of the adjustments for the sympathetic strings, so I have cut it into pieces.
 ( 103 ) 8-Aug-2015
And ten I glue them all in place.
 ( 104 ) 8-Aug-2015
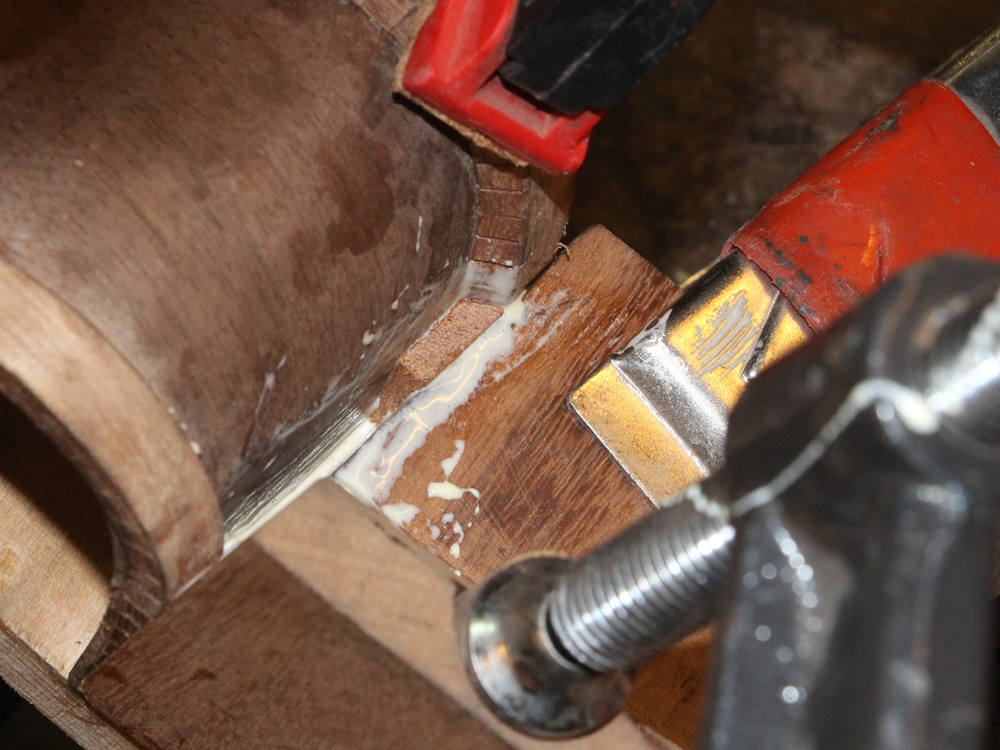
Now for the heel block.
 ( 105 ) 8-Aug-2015
 ( 106 ) 8-Aug-2015
A bit of glue.
 ( 107 ) 8-Aug-2015
 ( 108 ) 8-Aug-2015
Drop it in place.
 ( 109 ) 8-Aug-2015
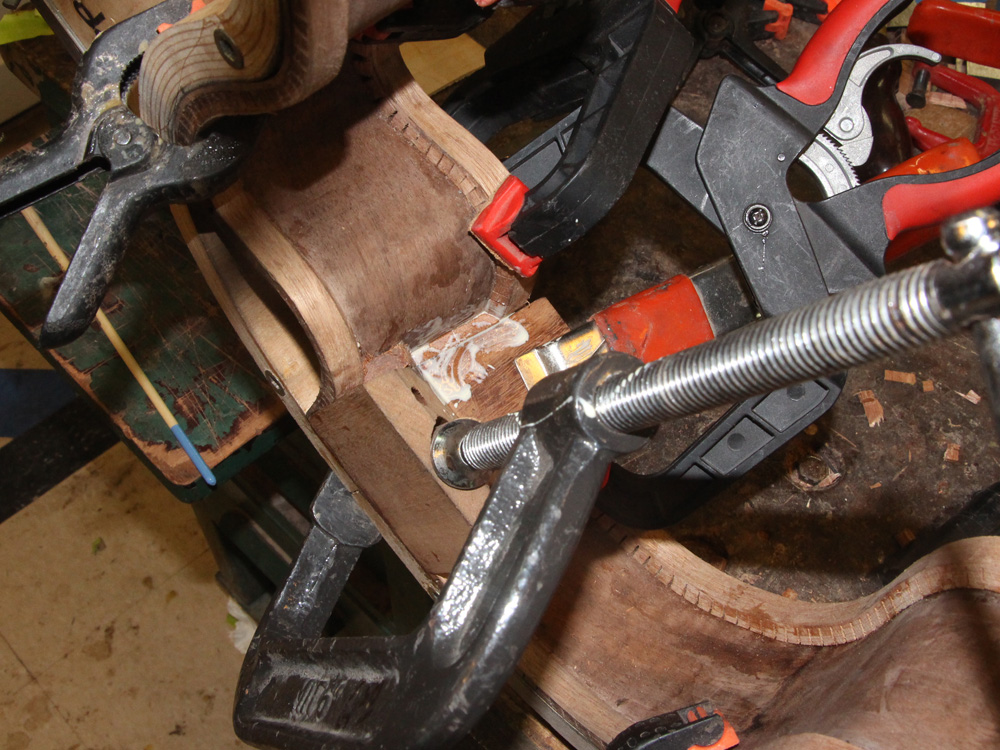
And start adding clamps.
 ( 110 ) 8-Aug-2015
These wedged spacers will match the shape of the kerfing
 ( 111 ) 8-Aug-2015
 ( 112 ) 8-Aug-2015
More clamps.
 ( 113 ) 8-Aug-2015
And more clamps.
 ( 114 ) 8-Aug-2015
 ( 115 ) 8-Aug-2015
 ( 116 ) 8-Aug-2015
I am pressing the heel block into place in every direction I can get a clamp into.
 ( 117 ) 8-Aug-2015
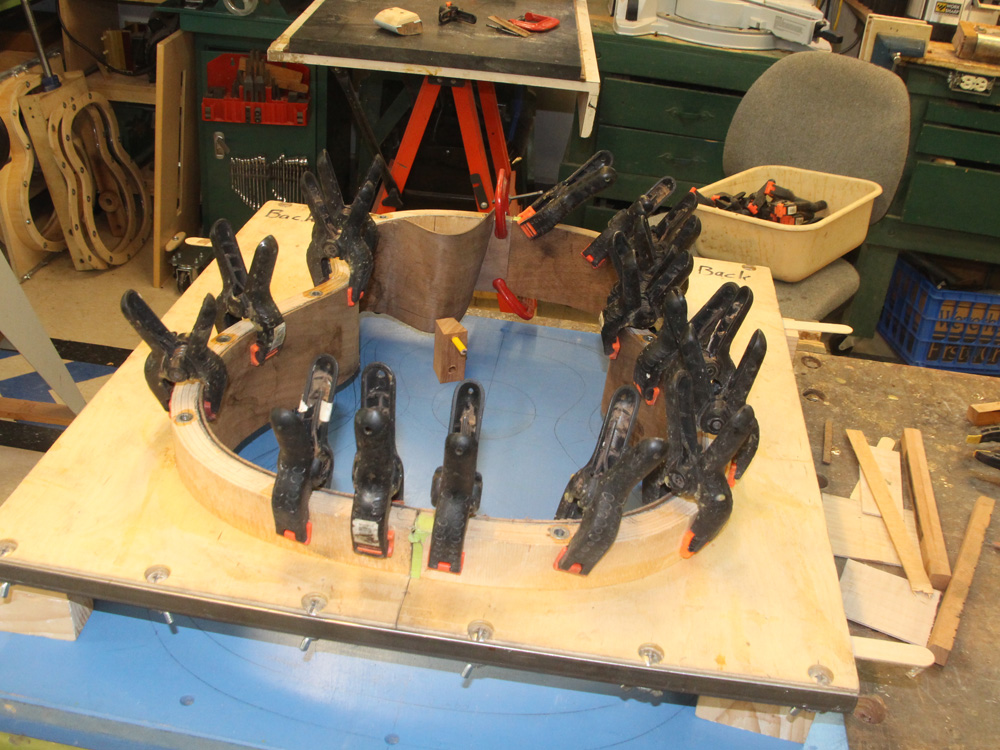
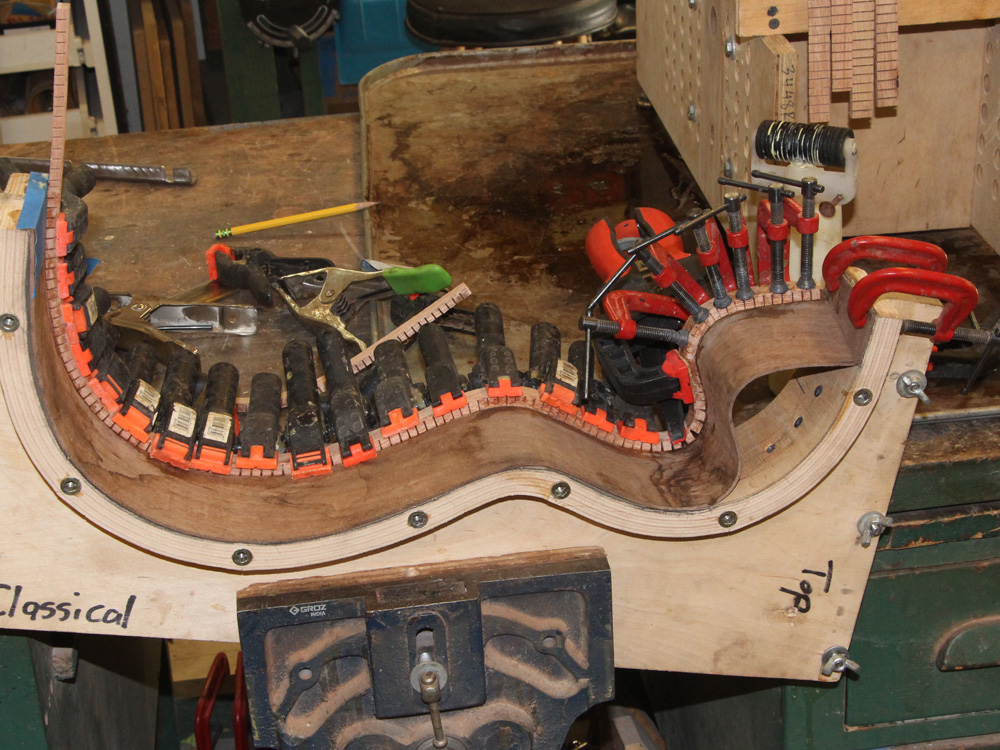
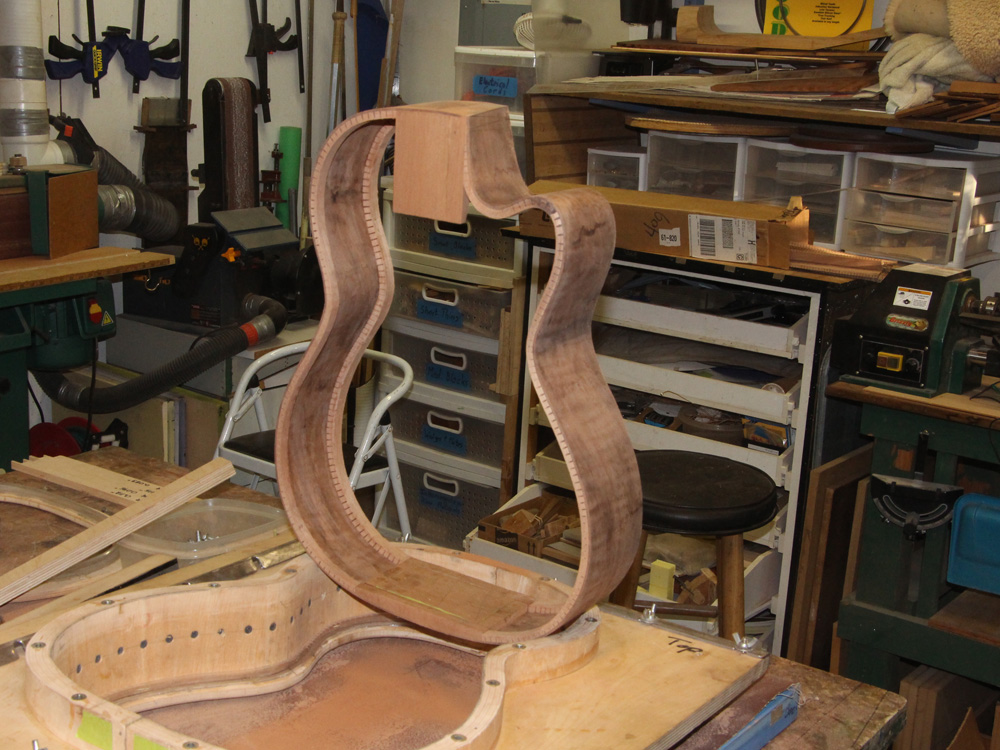
After the sides are glued together the rim goes into the form and is clamped in place.
 ( 118 ) 8-Aug-2015
I use the sanding plate to sand the edge of the rim to match the plate. The top and back will be built using these plates, so they will ultimately match shape around the perimeter when they are glued together. The sanding plates are built to have the same shape as the top and back.
 ( 119 ) 8-Aug-2015
The top rim gets the same treatment as the back rim.
 ( 120 ) 8-Aug-2015
 ( 121 ) 8-Aug-2015
And then I do a bit of fine tuning of the fretboard plate to make sure it is pointing in the right direction.
 ( 122 ) 8-Aug-2015
The rough rim.
 ( 123 ) 8-Aug-2015
Description
 ( 124 ) 8-Aug-2015
Description